Introduction to DIY Fishing Rod Crafting
Imagine sitting by a serene lake, waiting for a catch, with a fishing rod you crafted with your own hands. The pride of creating a DIY fishing rod adds to the joy of fishing itself. It’s not only a fulfilling hobby but also an essential survival skill. Whether you’re tapping into your inner survivalist or simply cherishing the ‘good old days’, crafting a fishing rod from natural materials is rewarding.
In this introductory guide, we’ll provide clear step-by-step instructions on how to make a fishing rod. We’ll cover everything from selecting the right branch to maintaining your handmade treasure. You may want to create a fishing rod on-the-go during a nature outing or plan a dedicated craft project at home.
No matter your reason for learning how to make a fishing rod, this guide is for starters and experienced anglers alike. With simple materials and a bit of patience, you’ll unlock the satisfaction of catching fish with a rod that’s uniquely yours. So, grab a stick, some basic tools, and let’s dive into the art of DIY fishing rod crafting.

Essential Materials for Building a Handmade Fishing Rod
To embark on the journey of creating your own fishing rod, you’ll need to gather some basic items. These materials are mostly straightforward and can often be found right in nature or your tool shed. Here’s what you’ll need to get started:
- A sturdy tree branch: Look for one about 6 feet in length and at least as thick as your thumb. This will be the backbone of your fishing rod.
- Sandpaper: You’ll use this to smooth out the branch, removing any rough spots, burls, or knots, creating a more comfortable grip.
- Fishing line: A must-have for your rod, ensure you have a durable fishing line capable of reeling in your catch.
- Fishing hook: Choose a hook that’s appropriate for the type of fish you’re aiming to catch.
- Additional tools: While not absolutely necessary, having a small knife or a pair of scissors will be useful for trimming the branch and working with the fishing line.
These items are the building blocks for your handmade fishing rod. With these essentials, you’re well on your way to crafting a simple yet functional fishing tool. Make sure each item is of good quality and suited for the specific fishing conditions you anticipate encountering.
Selecting the Perfect Tree Branch
Selecting the right tree branch is crucial for crafting a sturdy DIY fishing rod. Here are several tips to help you choose the best branch for your homemade fishing pole:
- Look for Freshness: Opt for a fresh, green branch rather than dry or brittle ones. Fresh branches are more flexible and less likely to snap under pressure.
- Check the Diameter: The branch should be as thick as your thumb or thicker. This ensures it can handle the weight and struggle of a caught fish.
- Length Matters: A good length for your fishing rod is around 6 feet. This provides a decent reach and makes it easier to handle.
- Inspect for Flaws: Examine the branch closely for signs of disease, insects, or damage. Such imperfections can weaken the rod’s structure.
- Choose Straightness: While a perfectly straight branch may be hard to find, look for one with minimal curves or bends to ensure better control and predictability when fishing.
Following these guidelines will help you find a suitable branch that can be turned into an efficient fishing rod. Tapping into the simplicity and resourcefulness required to make a fishing rod can heighten your outdoor experience.

Preparing the Stick for Your Fishing Rod
Once you’ve selected the right tree branch, it’s time to transform it into a fishing rod. Here’s how to prepare the stick properly:
- Strip the Branch: Start by removing all leaves, smaller side branches, or shoots with your hands or a small knife.
- Sand the Surface: Using the sandpaper, smooth the branch to remove any burls, knots, or rough spots. This makes for a comfortable grip and a clean look.
- Refine the Ends: Trim the thicker end to create a flat base and the thinner end to form a tip. This provides a secure spot for the fishing line to attach.
- Allow it to Cure: If possible, let the wood dry out a bit. This step isn’t mandatory, but a dryer stick can be stronger.
Preparing the stick is about making sure it feels right in your hands and will hold up against the strength of a fish. Take the time to do this step with care, as a well-prepared stick is the foundation of a good DIY fishing rod.
Attaching the Fishing Line Correctly
Attaching the fishing line is a crucial step in making your DIY fishing rod functional. Here’s how to do it:
- Choose the Right Fishing Line: Use a strong, durable line suited for the type of fish you aim to catch.
- Tie a Secure Knot at the Base: Start by tying a knot at the base of the stick. This position is strategic as it helps handle bigger fish without breaking the rod.
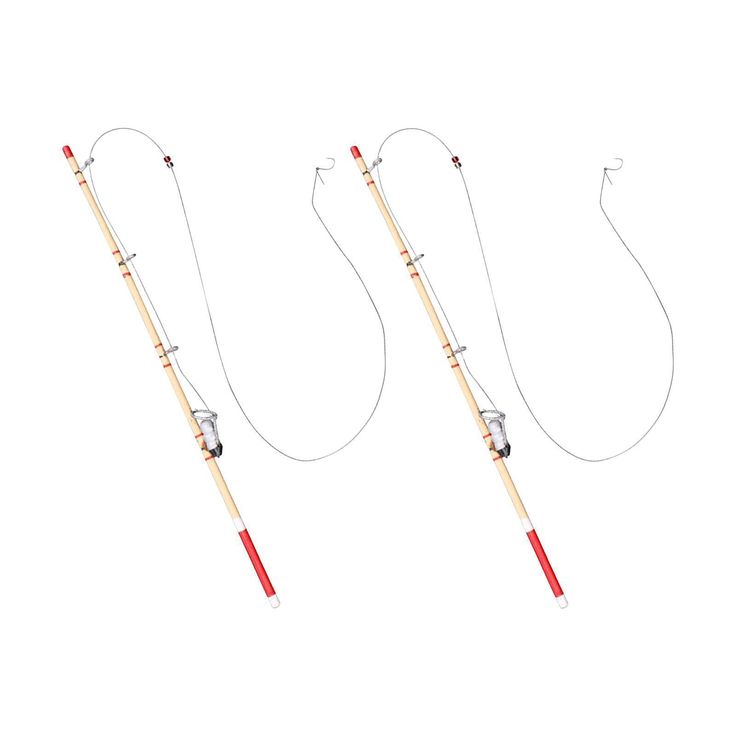
- Wrap the Line: After securing the base, wrap the line tightly spiraling up to the tip of the branch. Ensure the line is snug against the wood with no slack.
- Loop at the Tip: Once you reach the tip, create a small loop. This loop will allow for easy attachment and adjustment of your fishing hook or lure.
These steps ensure that your line remains secure on your homemade fishing rod, enabling successful fishing adventures.

Final Steps to Assemble Your Fishing Pole
You’re almost done with crafting your own fishing rod! Here are the final touches to create a fully operational DIY fishing pole:
- Inspect the Assembly: Check the attached line along the branch to ensure it’s secure and evenly wrapped.
- Attach the Hook: Tie your fishing hook at the end of the line. Make sure the knot is strong.
- Test the Tension: Gently pull the line to see if it holds the weight and tension.
- Adjustments: If necessary, make adjustments to the line or knots to improve stability and function.
- Trial: Test your fishing rod in a safe, shallow area to ensure functionality.
By carefully following these steps, you will have crafted not just a fishing rod, but a reliable tool for your fishing adventures. Happy fishing!
Tips for Using Your Homemade Fishing Rod
After creating your DIY fishing rod, follow these practical tips to get the most out of your handmade tool:
- Practice Casting: Before heading to the water, practice casting in an open area. Short, controlled casts work best with a DIY rod.
- Use Lighter Bait: Your homemade rod might not handle heavy lures. Opt for lightweight bait for better control.
- Stay Close to Shore: Fish in areas where you can easily manage your rod. Avoid deep waters where big fish might challenge the strength of your stick.
- Be Gentle: When you hook a fish, be gentle. Sudden movements can damage your rod. Guide the fish in slowly.
- Check Secureness: Regularly ensure the fishing line and hook are securely attached to avoid losing them.
- Mind the Environment: Avoid getting tangled in vegetation. Your fishing rod is more basic and might not handle snagging well.
By keeping these tips in mind, you’ll enhance the fishing experience with your homemade fishing rod. It’s a simple pleasure to fish with a rod you’ve crafted by hand, so take your time, enjoy the process, and savour each catch.
Maintenance and Care for Your DIY Fishing Rod
Once you’ve followed the steps to create your own fishing rod, maintaining it is key. Proper care will extend its life and make your fishing experiences more enjoyable. Here are some straightforward tips for maintaining your handmade fishing rod:
- Keep it Dry: After each use, wipe down the rod with a cloth to remove moisture. This prevents the wood from rotting.
- Store Properly: When not in use, store your fishing rod in a dry place. Hang it up or lay it flat, away from direct sunlight or heat sources.
- Check Regularly: Periodically check your rod for any signs of wear or damage. Look for cracks in the wood or fraying in the line.
- Repair Promptly: If you find any damage, repair it as soon as possible. Replace the fishing line or sand down splinters to avoid further deterioration.
- Apply a Protective Coat: To further protect the wood, apply a thin layer of linseed oil or a similar protective sealant once a year.
Taking good care of your DIY fishing rod not only ensures that it lasts, but it also retains its function and performance for your next fishing adventure. Remember, the key to a durable fishing rod is simple, regular maintenance. Keep these tips in mind, and you’ll enjoy the fruits of your labor for many seasons to come.